|
|
Materials:
- 30cm x 30cm (12in. x 12in.) piece of flexible foam, Small pieces of cardboard
- Scissors
- String
- Foam Scraps
- Project glue
- Colored markers
|
|
|
Instructions:
- Measure around the crown of your head with a piece of string. Cut the string to that length.
- Arrange the string in a circle on a 30cm x 30cm (12in. x 12in.) piece of foam.
- Trace the string circle onto the foam. This guarantees that your new crown will fit perfectly!
- Next, find the center point of the circle that you have just drawn. Draw 12 lines (radii) from the center point of the circle to the circle's edge. These lines should be evenly space around the circle.
- Cut along these radiating lines, stopping at the point where the line touches the circle's edge.
- Draw a large circle around the first circle that you originally drew - about 3cm (1 in.) larger all the way around. Cut out the second, larger circle. You have a wearable crown at this point!
- For a finishing touch use the colored markers to color and decorate your crown. Use the scrap foam to cut out jewel-shapes and glue them on each point.
[Return To List]
|
|
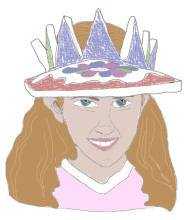
Materials:
- Discount store straw hat, or plain colored baseball cap
- Scissors
- String
- Small Toys
- Plastic Flowers
- Brightly colored beads
- Ribbon
- Lace
- Buttons
- Acrylic paints
- Craft glue and/or glue gun
|
|
|
Instructions:
This is a really great recycling project. The sky is the limit. Any old materials that you have around the house can be used on these elaborate and zany hats!
- The rules are absolutely few...
- Start with your recycled or discount store hat.
- Use all of the materials that you have available to create, the zaniest, craziest, most elaborate, largest hat that you possibly can!
- Work this great craft into the party by awarding prizes for the most fantastical hat.
[Return To List]
|
|
Colorful Tissue Paper Vases:
|
Materials:
- Tissue paper in a variety of colors
- Recycled, clean, empty jars
- Varnish or Podge (found in craft stores)
- Newspaper
- Scissors
- White glue
- Spoon
- Recycled plastic containers (empty yogurt containers)
- Glue Brush
- Varnish Brush
|
|
|
Instructions:
- Cover your work surface with newspaper to protect it.
- Take the tissue paper and cut it into a variety of shapes. Try making stars, circles, squares, squiggles, etc. Make these shapes in a variety of sizes.
- Mix 25ml of glue (2 tbsp.) with 10 ml of water (2 tsp.) in each of the recycled plastic containers.
- Brush the glue mixture onto a small area of the cleaned jar.
- Put pieces of tissue paper onto the glued area. Smooth the edges of the tissue paper down with the glue brush.
- Continue to glue and brush tissue paper onto the jar, until it is completely covered.
- Let the vase dry completely. Gauge dryness by touching the vase in places periodically.
- Once the vase has dried, use a clean brush and cover with varnish. This gives your vase a permanent, water-proof sheen.
[Return To List]
|
|
|
|